TrackNList, start to finish.
List once. Sync everywhere. Delist when it sells. This is the whole app, top to bottom.
What is TrackNList?
TrackNList (TNL) is a cross-listing and inventory sync tool for resellers. You keep one master inventory. TNL pushes it out as listings on the marketplaces you connected. When it sells, quantity should drop everywhere else so you don’t double-sell.
Platforms in the app today: eBay, Grailed, Mercari, Shopify, StockX, Poshmark, Alias (GOAT), Amazon, Etsy, Depop, Facebook, Poizon. TikTok Shop is plan-gated. Amazon and Etsy show as coming soon on connect.
Three objects. Don’t mix them up:
- Inventory — the master item. Photos, size, qty, cost, listed price.
- Listings — that item on a specific marketplace. One product can have many listings.
- Sync — keeps qty/status honest. Oversell risk = OOS in inventory but still live somewhere.
There is no draft or test mode. Statuses you’ll see: LISTED, UNLISTED, DELISTED, plus OOS on quantity.
Getting Started
Open Getting Started in the sidebar. It’s a checklist based on your account, not a forced tour.
Each card has 3 sub-steps, a View GIF link, and Open. The header shows how many steps are done.
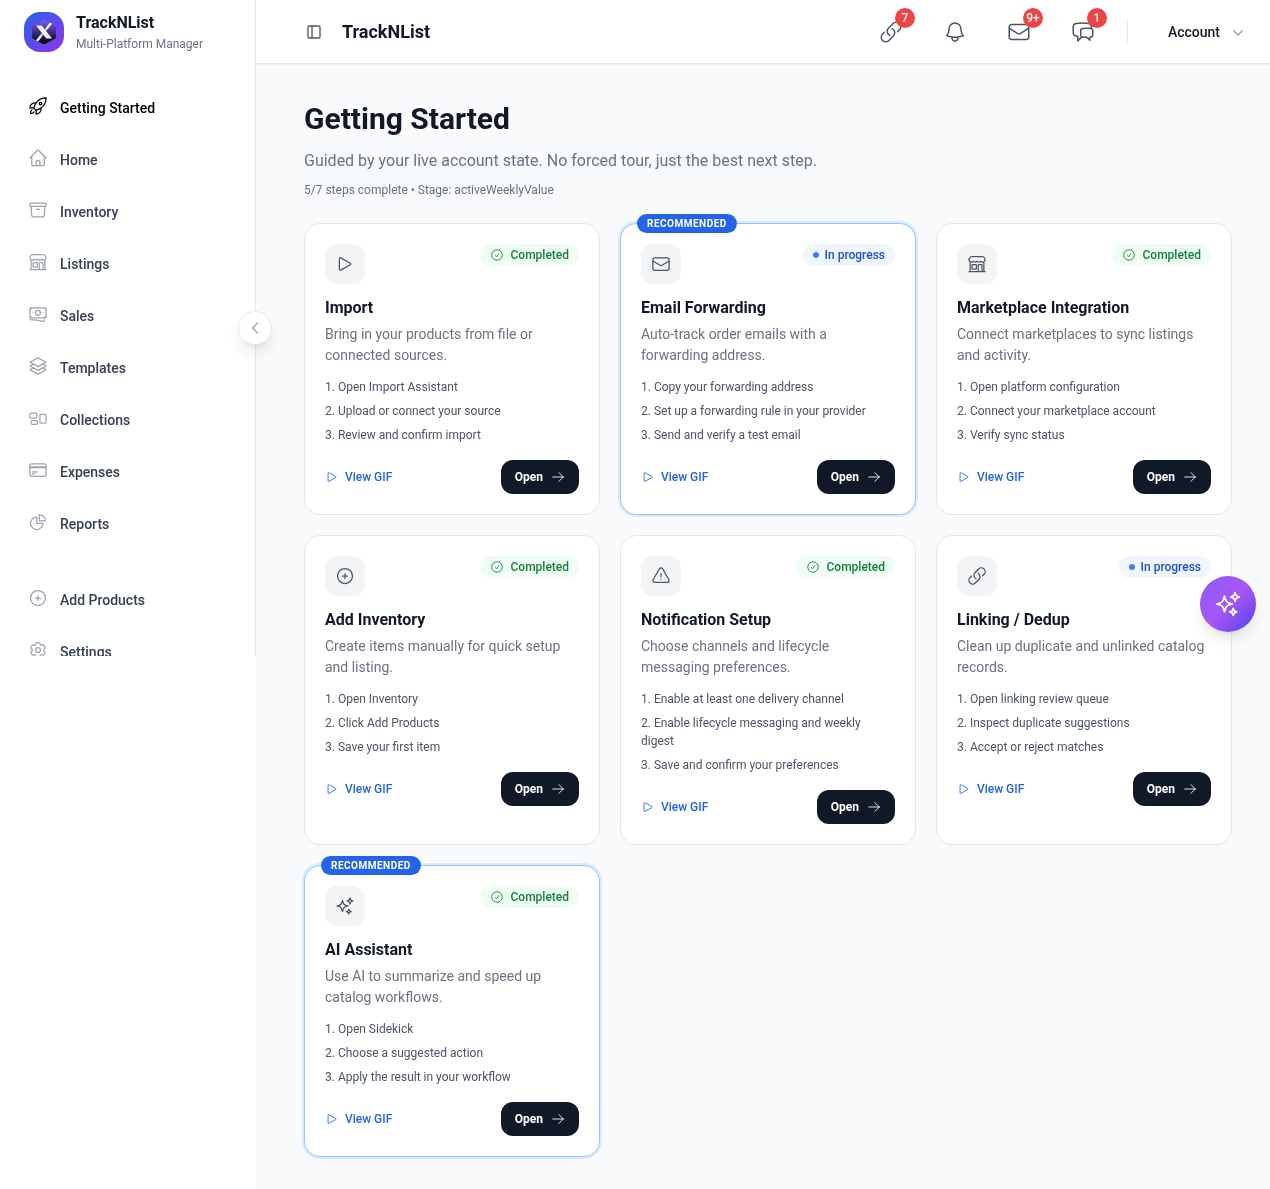
Completed cards get a green badge. In progress stays a blue dot.
-
Work the cards in this order. Skip anything already marked Completed.
- Import — bring products in from file, Sheets, or Shopify.
- Email Forwarding (Recommended) — auto-track order emails.
- Marketplace Integration — connect accounts, verify sync.
- Add Inventory — create items manually. Open Inventory → Add Products → save.
- Notification Setup — channels + lifecycle events.
- Linking / Dedup — review duplicate suggestions, accept or reject.
- AI Assistant — Sidekick (purple sparkle, bottom right).
How do I get in and what’s the layout?
-
Go to https://app.tracknlist.com and sign in with the Google account on your TNL user.
-
Left sidebar is the whole app. Learn it once.
- Getting Started, Home, Inventory, Listings, Sales, Templates, Collections, Expenses, Reports
- Add Products is a button at the bottom of the sidebar, not a page.
- Settings is under that.
-
Top right, every page: Catalog Proposals (link icon), Notifications, Messages, Chat, Account.
Home
Home is the pulse. Welcome banner, KPIs, then recent activity.
-
Click Home. You’ll get + Add Product and View Reports in the hero.
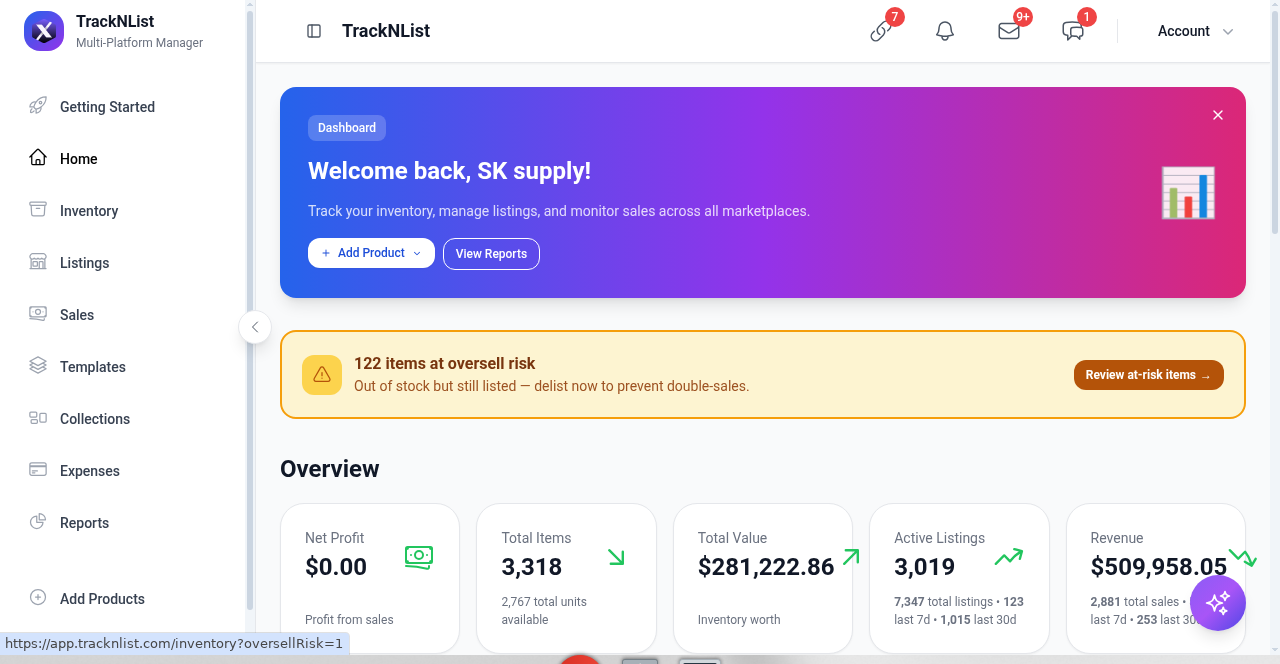
Home. Treat the amber oversell banner as urgent.
-
Read the overview cards: Net Profit, Total Items, Total Value, Active Listings, Revenue.
-
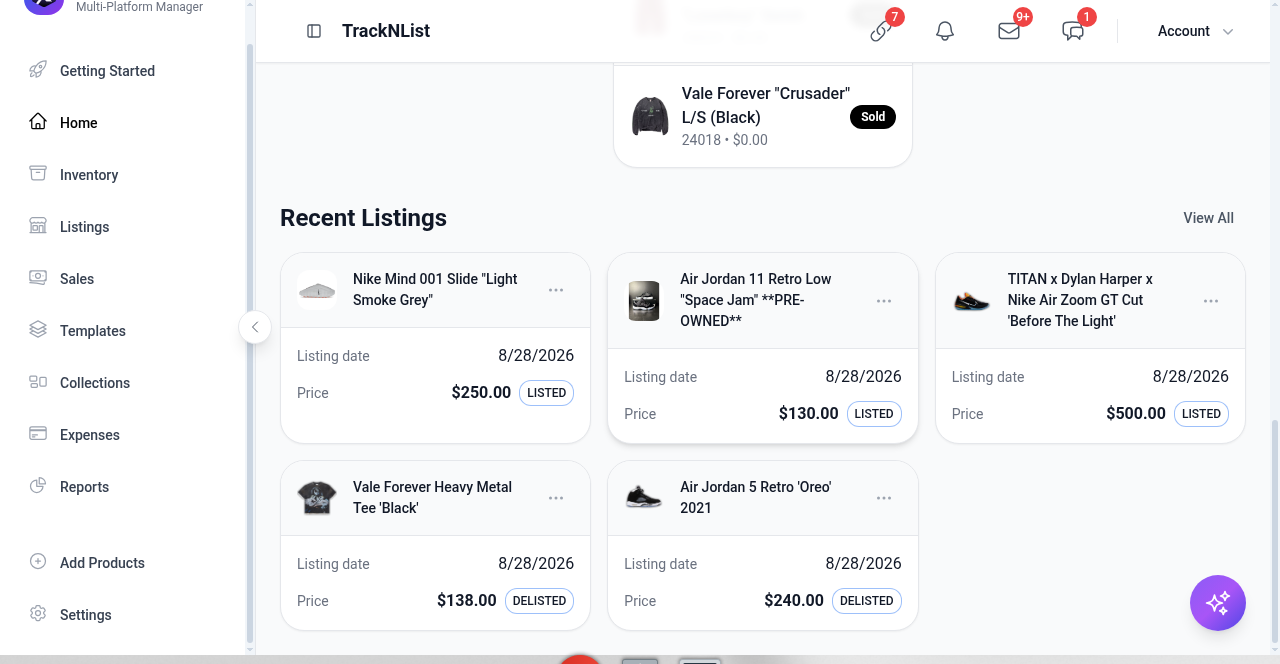
Scroll for Recent Listings. Badges are LISTED, DELISTED, Sold.
Inventory
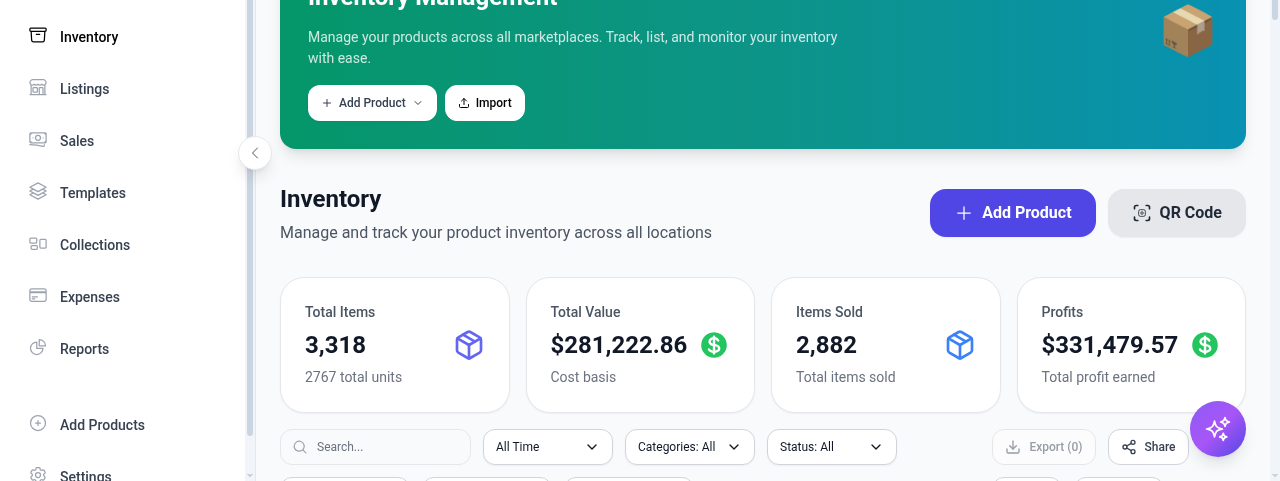
This is the source of truth.
-
Open Inventory. Hero has Add Product and Import.
-
Filter by search, time, category, status, Stock Level, Oversell Risk, Collection. Bulk Edit is for mass changes. Don’t use it until you mean it.
-
Each row is a master item: thumbnail, title, brand • SKU, green Synced chip, sizes, cost, listed price, qty or OOS, LISTED/UNLISTED, actions ⋯
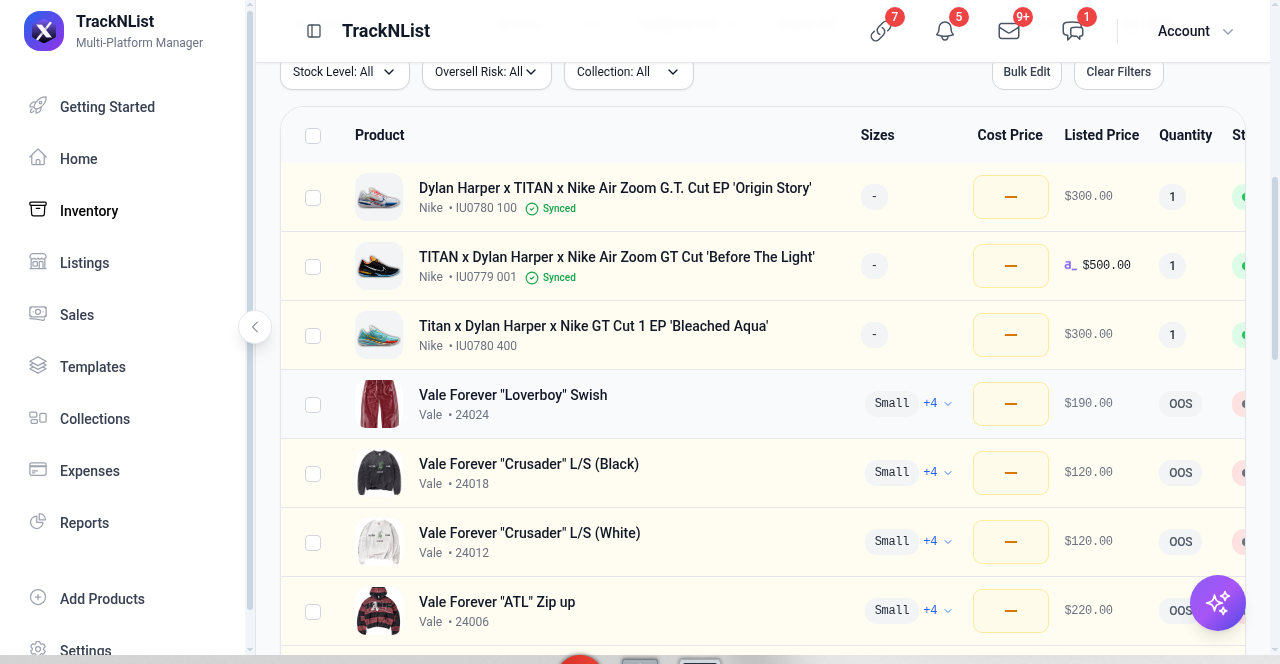
Green Synced = TNL thinks this item is tied to marketplace listings. OOS = qty 0. If it’s still listed somewhere, that’s oversell risk.
-
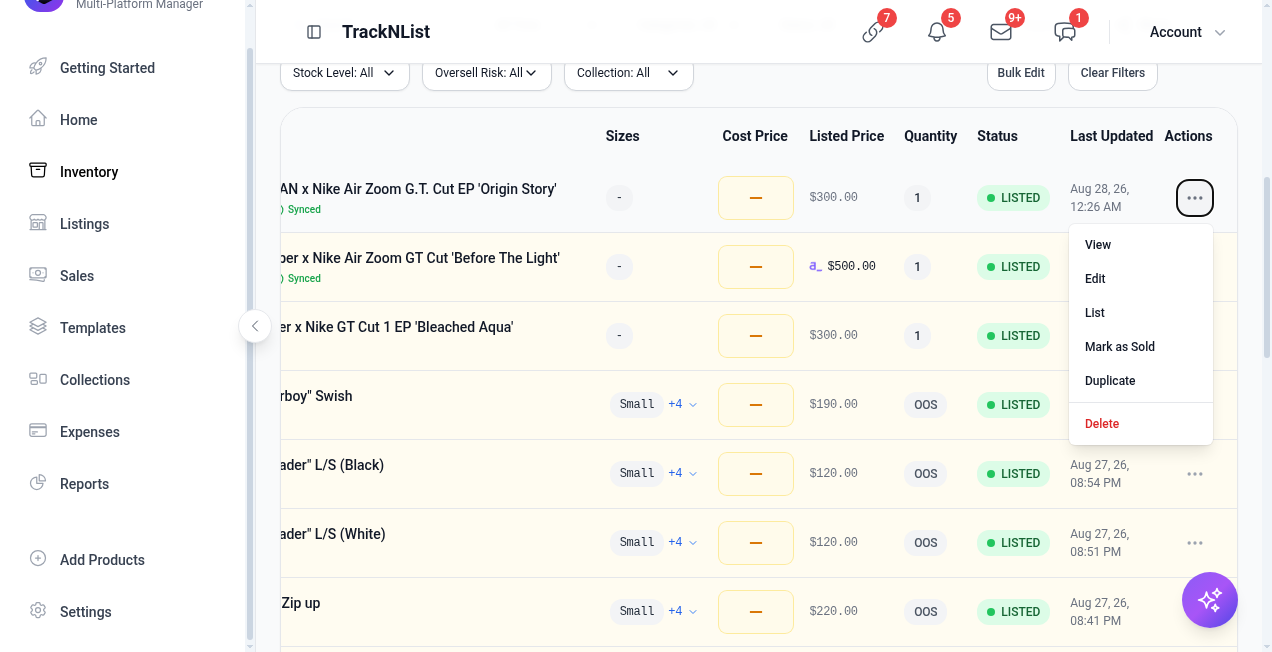
Row ⋯ is View, Edit, List, Mark as Sold, Duplicate, Delete. List opens the same listing wizard as + Add Listing.
Listings
Listings are the marketplace copies. Sidebar says Listings.
-
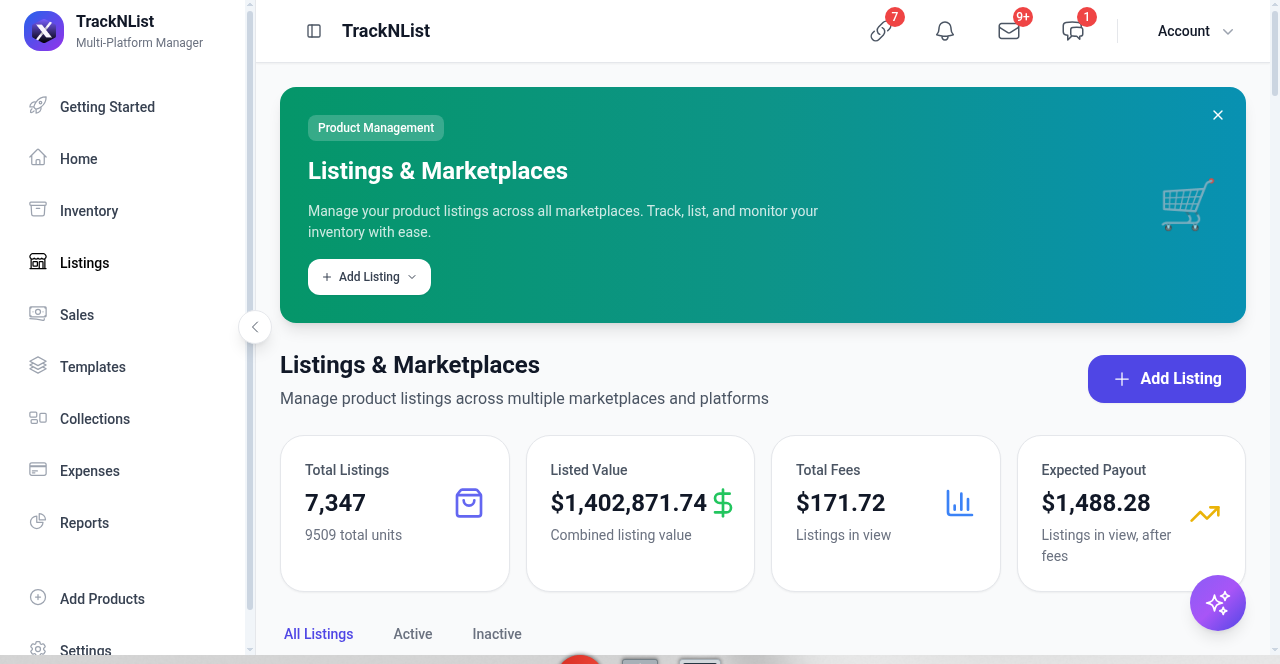
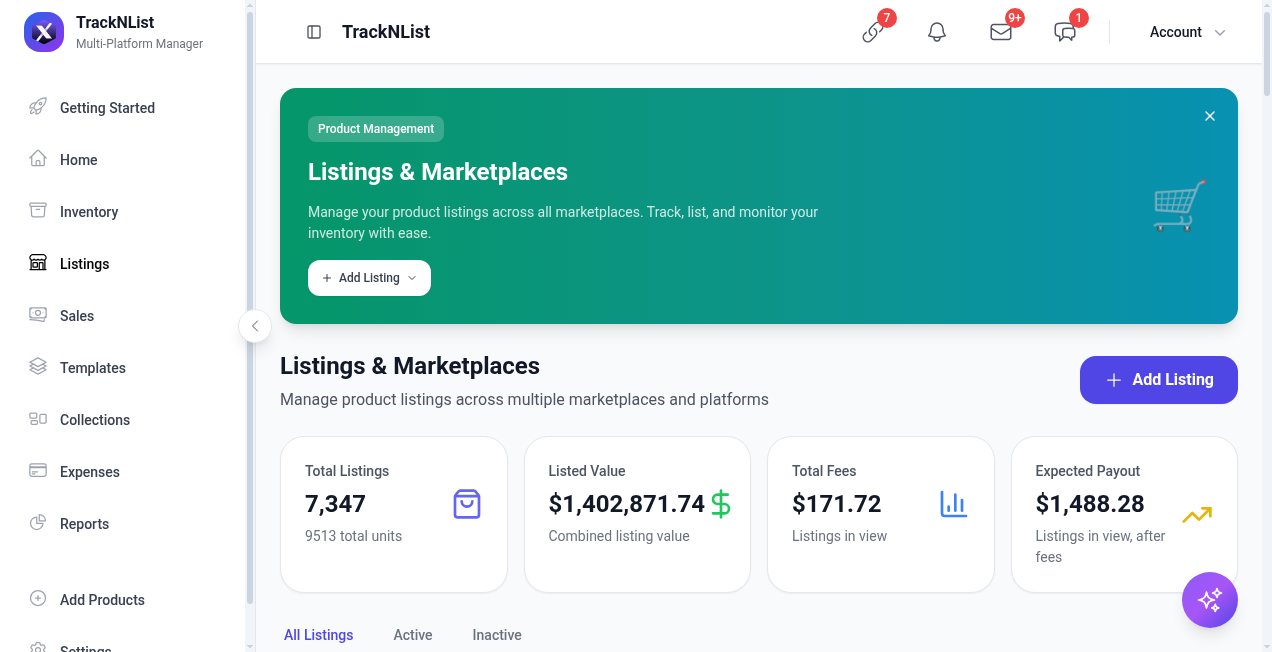
Open Listings. Hero has + Add Listing. KPIs: total listings, listed value, fees, expected payout.
-
Tabs: All Listings, Active, Inactive. Filter by time, status, Platform.
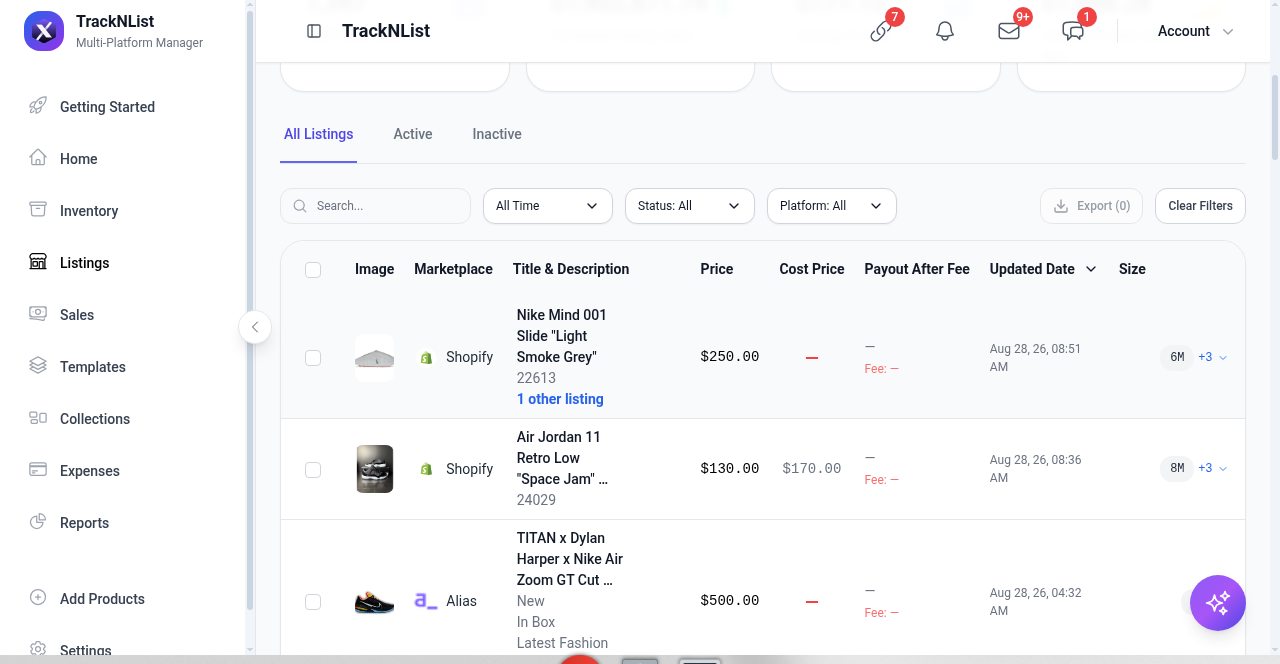
Each row is one marketplace. 1 other listing / N other listings means it’s already cross-listed. Duplicate text is the Linking / Dedup queue.
Sales
Sales across marketplaces. KPIs for total sales, revenue, profit, and top platform. Tabs: Active Sales / Archived.
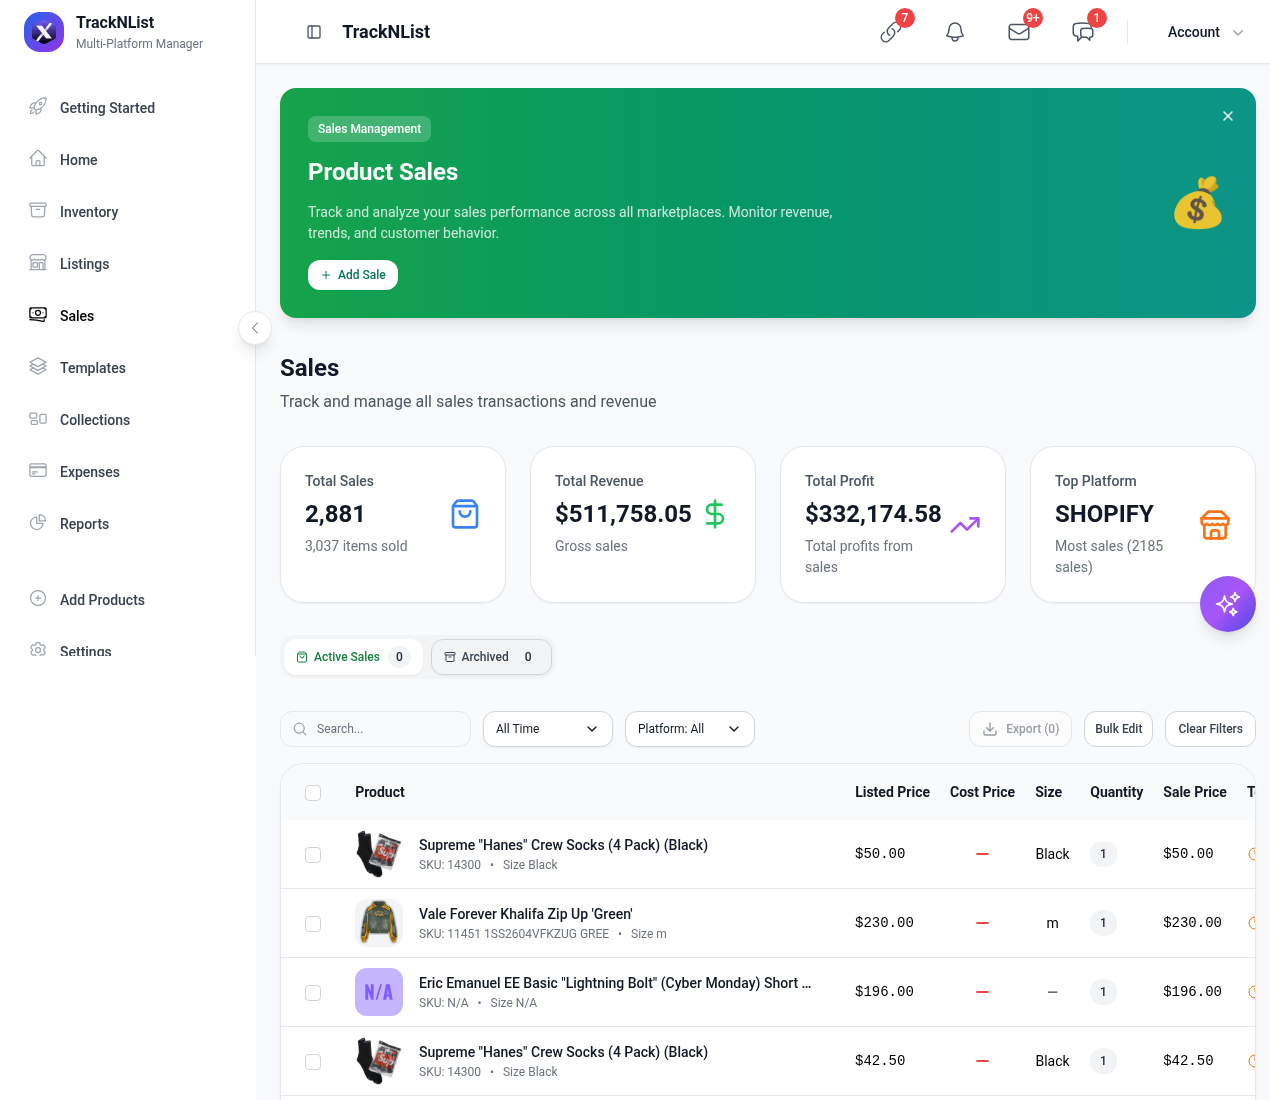
Search and filter by platform to narrow the table. + Add Sale is for off-platform sales you still want tracked.
Templates
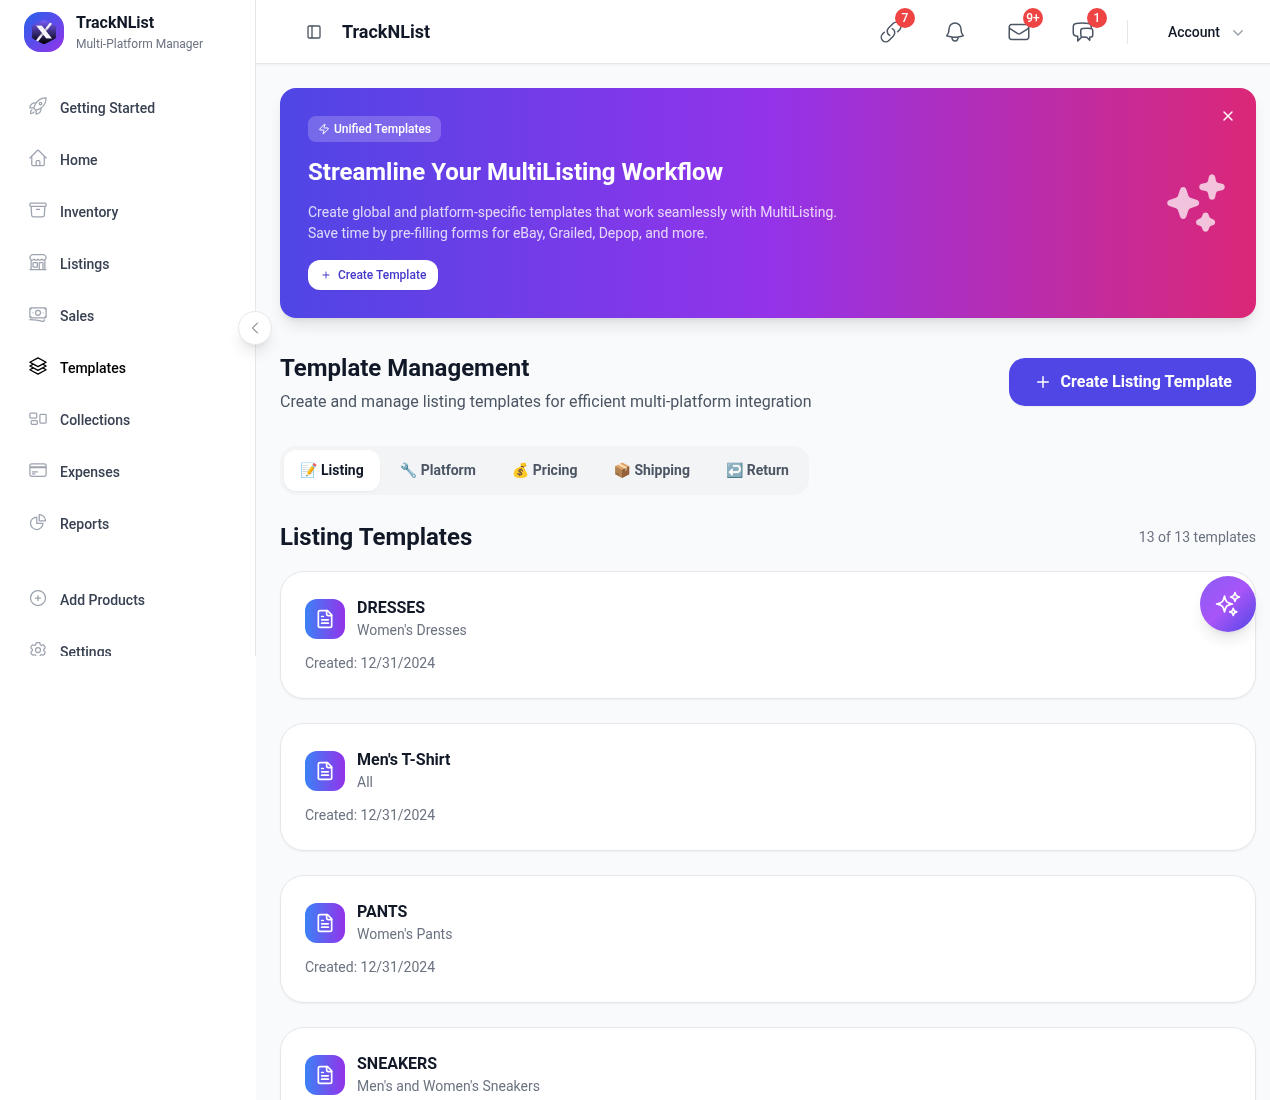
Templates pre-fill listing forms so you’re not rewriting shipping and titles every time. Tabs: Listing, Platform, Pricing, Shipping, Return.
-
Open Templates. Hit + Create Listing Template if you list the same category on repeat (Sneakers, Tees, etc.).
-
Make Platform templates for eBay / Grailed / Depop quirks (title length, category, shipping). Then Add Product picks them up.
Collections
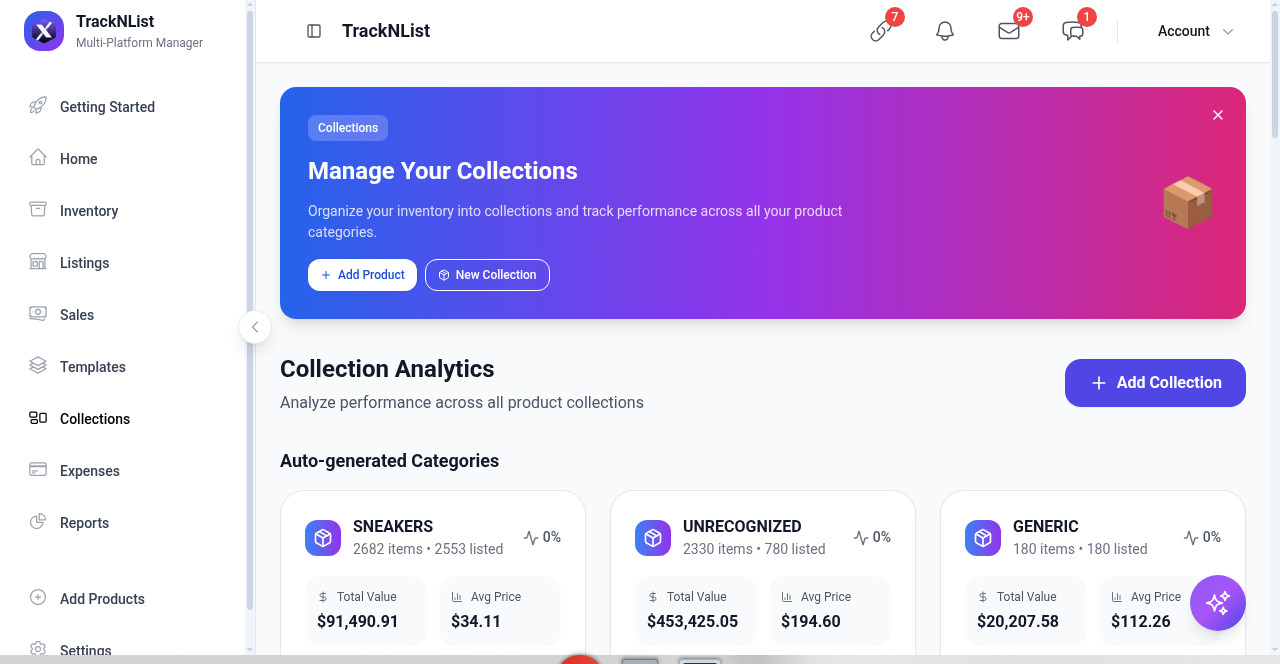
Collections group inventory. TNL also auto-generates categories (SNEAKERS, UNRECOGNIZED, GENERIC, …) with item counts, listed counts, and value.
-
Open Collections. Use + Add Collection for your own groups. Auto-generated categories are fine as a starting map of the catalog.
Expenses
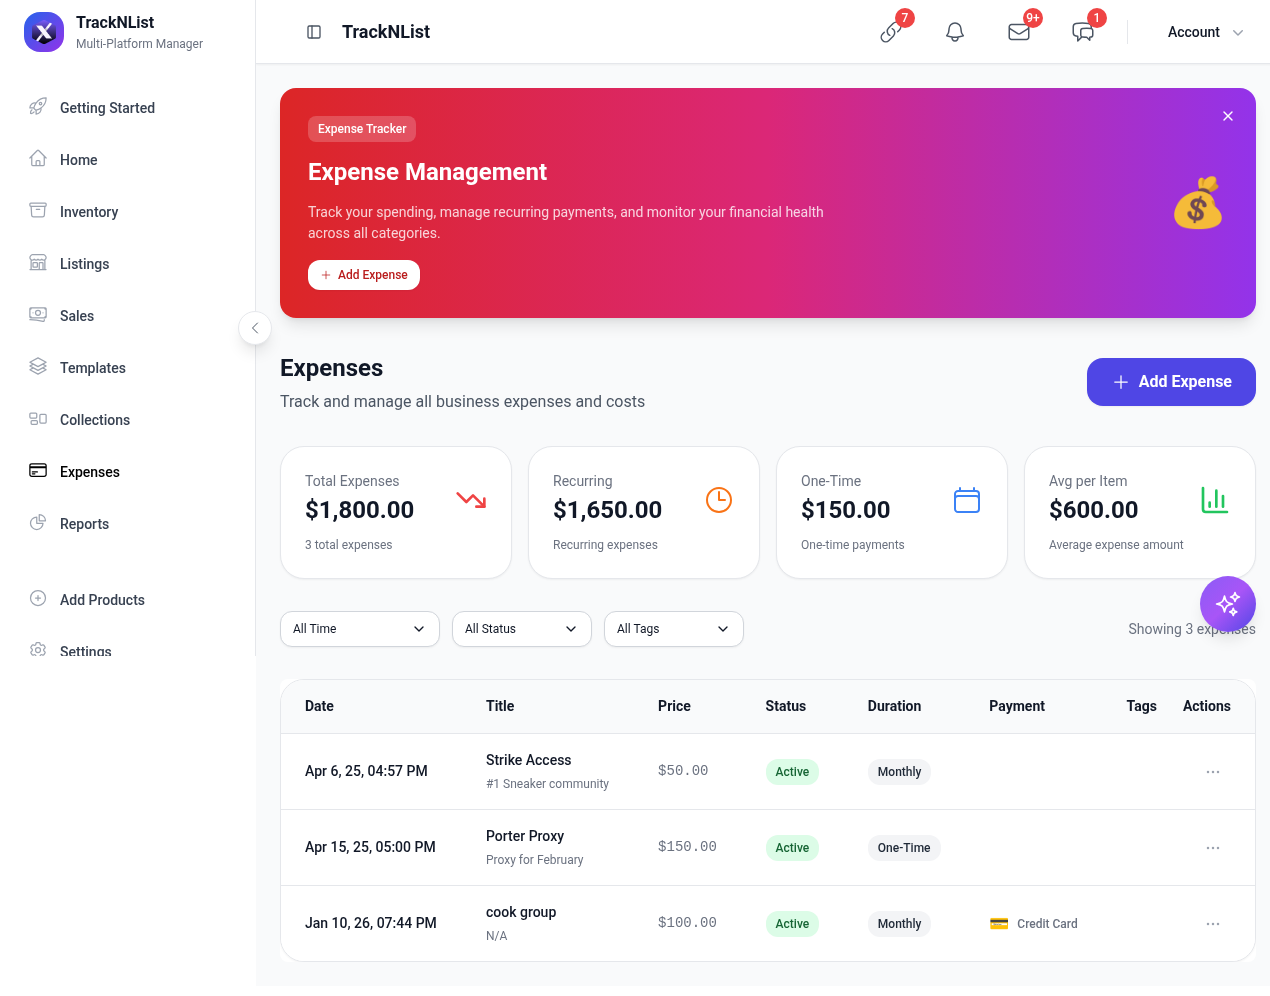
Track costs so profit isn’t a guess. Recurring vs one-time. + Add Expense for rent, software, shipping supplies, etc.
Reports
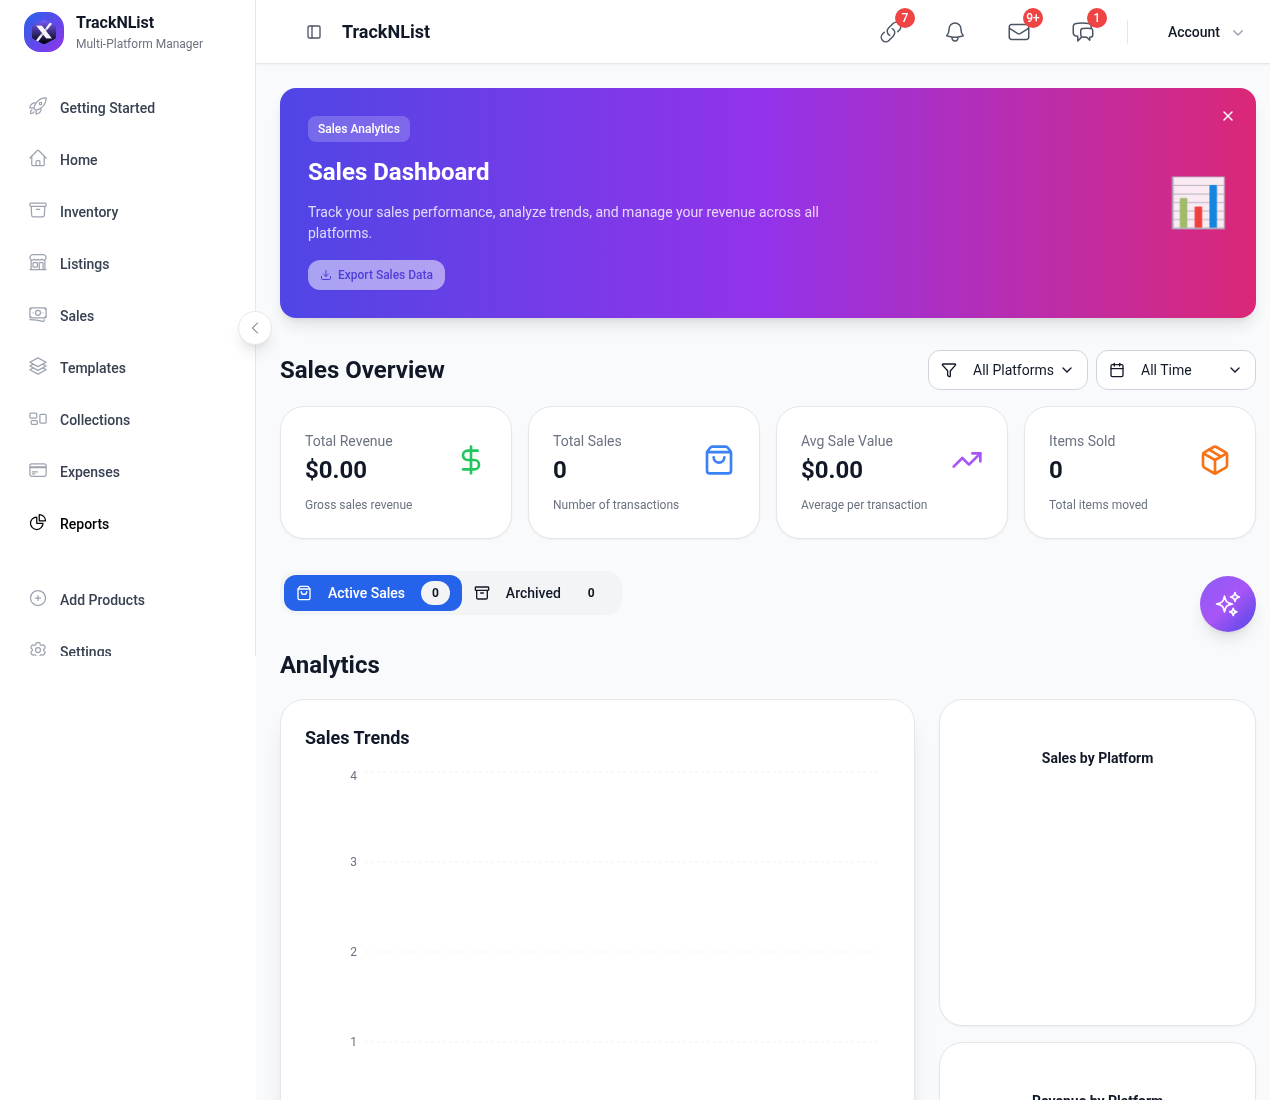
Reports is the Sales Dashboard. Filter by platform and date. Export Sales Data dumps the view. If the cards show $0, set filters to All Platforms and All Time.
How do I add a product and list it?
Two moves. Add Products saves the item in Inventory. That does not put it on a marketplace. Listing is a second wizard: Listings → + Add Listing (or Inventory row ⋯ → List). Three tabs: Selection, Basic Info, Platform Config.
-
Click Add Products in the sidebar (or + Add Product on Home / Inventory). That opens Add New Product on the Basic Info tab.
-
Fill Product Name. Add a size row (size, qty, cost). Drop images — first image is the main photo, and they’re required when you list to marketplaces. Click Save Product.
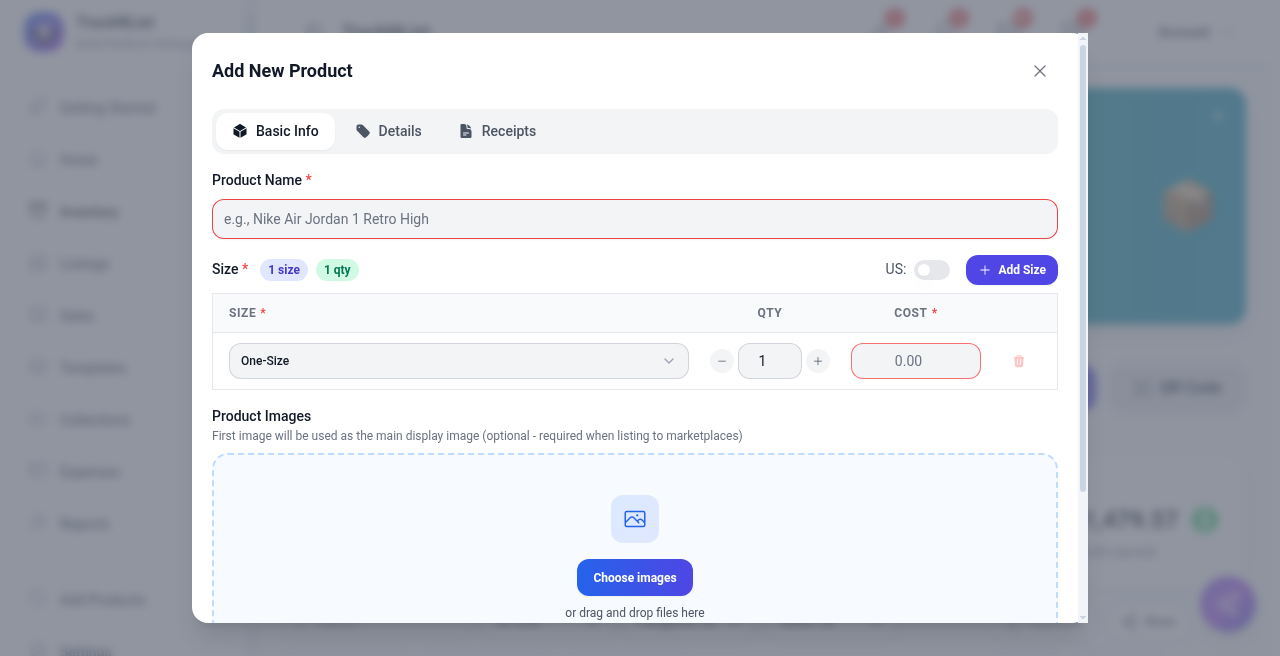
This only creates inventory. Status stays UNLISTED until you list it.
-
Open Listings. Click + Add Listing in the hero or the purple button under the title.
-
Selection. Pick the product (or + Add Product inside the modal). Then tap every marketplace you want it on. That’s the cross-list: one product, many sites.
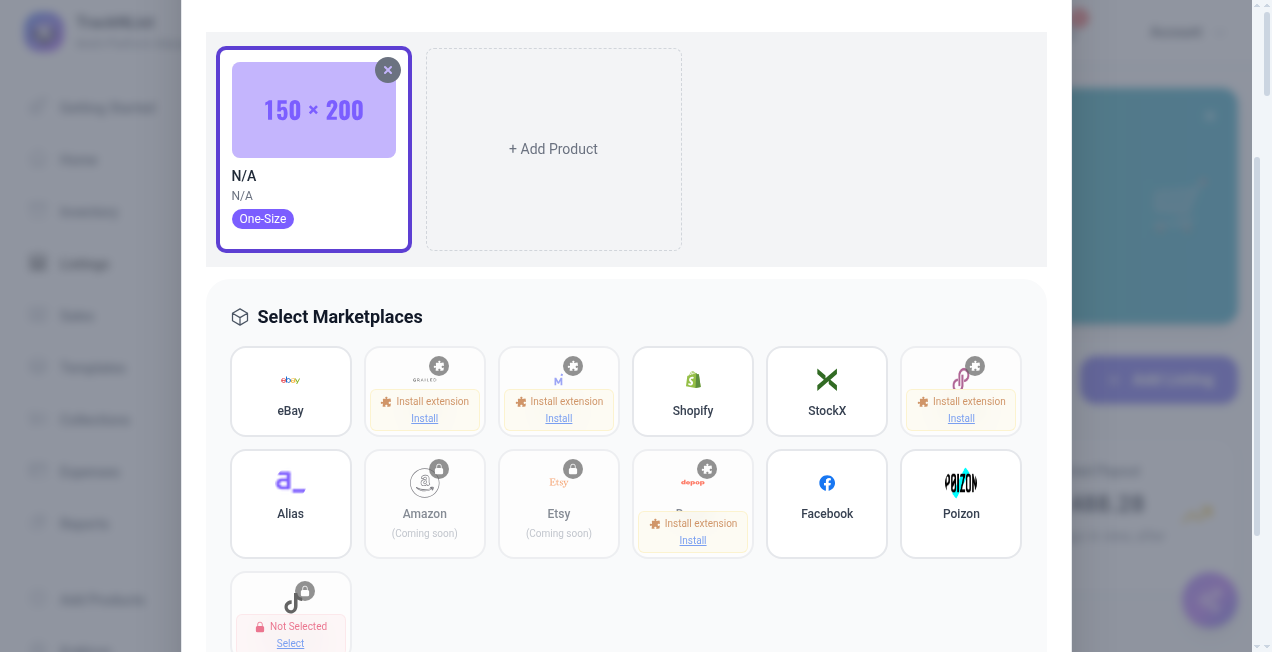
Connected platforms are ready. Install extension = Grailed, Mercari, Depop, Poshmark. Coming soon = Amazon, Etsy.
-
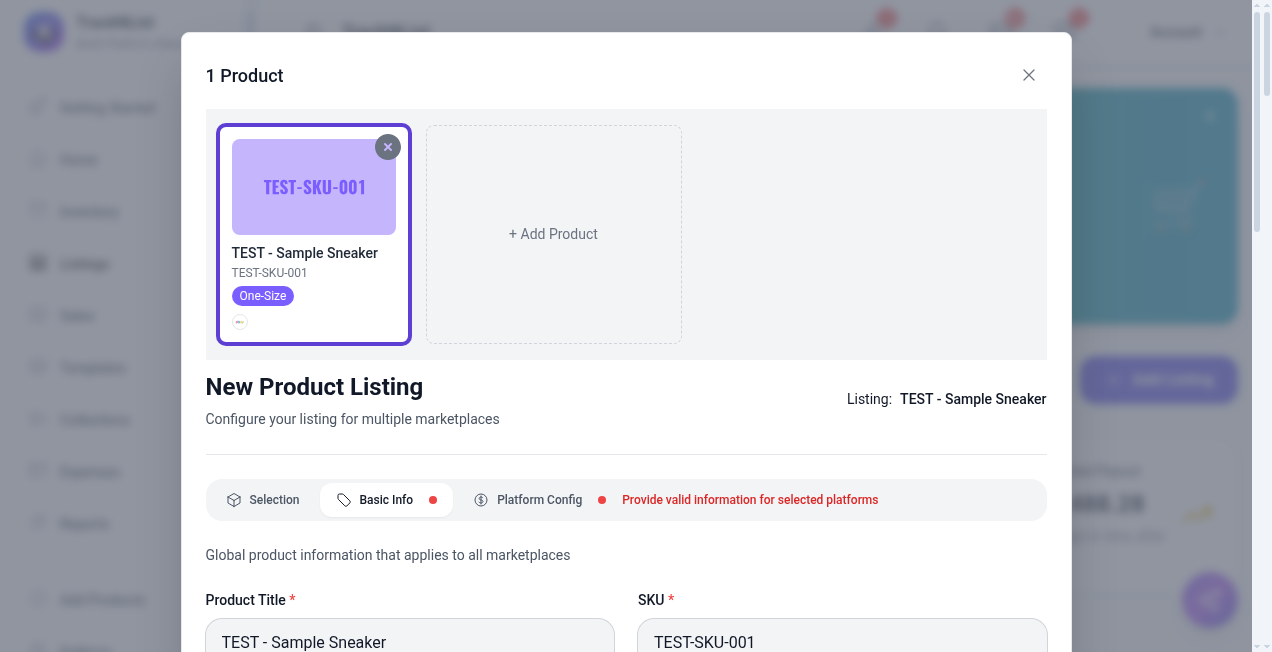
Basic Info. Title, SKU, brand, description, listing price, tags, size, quantity, and product images. This copy applies to every site you picked. A red dot on the tab means a required field is still empty.
-
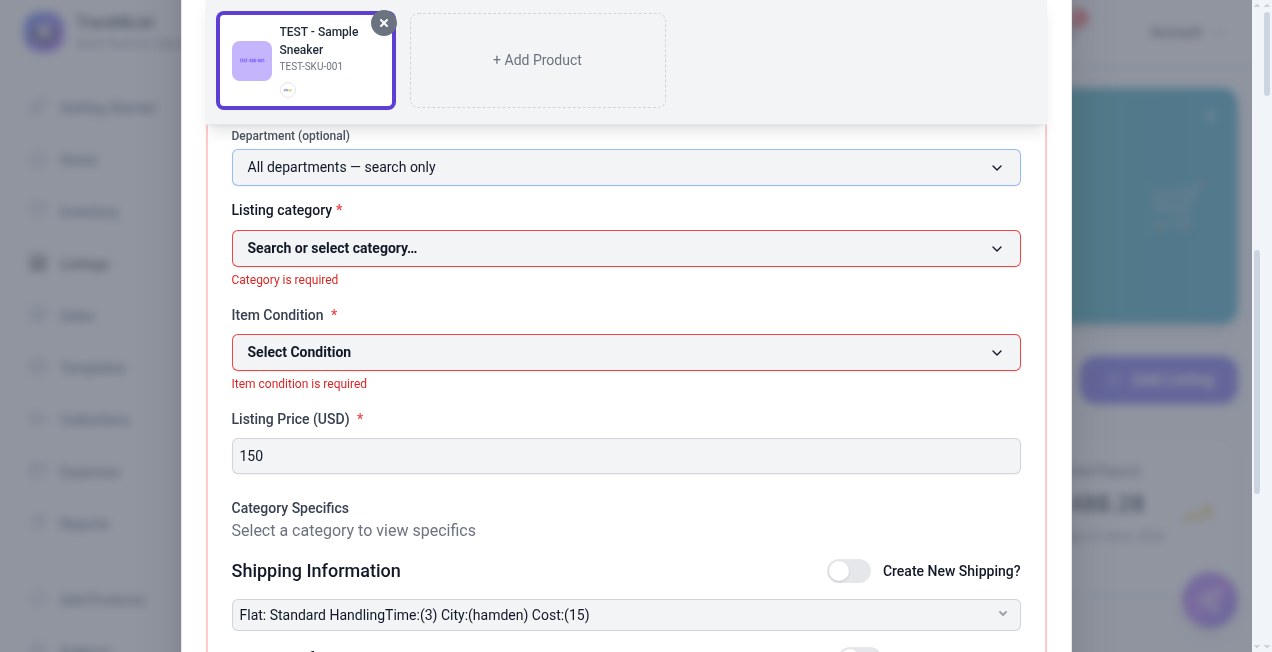
Platform Config. Per marketplace: template, category, item condition, listing price, category specifics, shipping, pricing, return policy. eBay is the pickiest. Red borders mean that platform still needs a field.
-
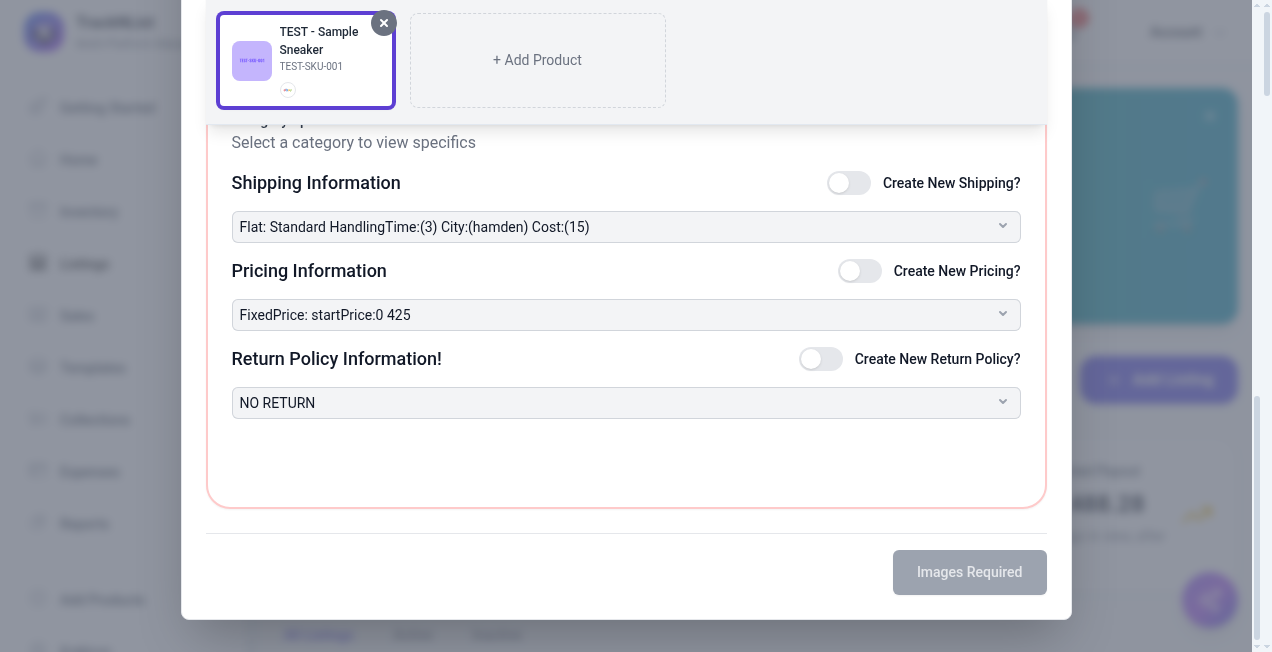
Images are required to go live. Until photos are on the product, the button stays disabled as Images Required. When it enables, that click publishes — there is no draft mode. Close the modal if you’re not ready. Inventory stays UNLISTED.
Settings
Gear icon in the sidebar. Tabs: General, AI, Billing, Account, Email Forwarding, Notification Preferences, Fee Preferences, Plans & Addons, Platform Configurations.
-
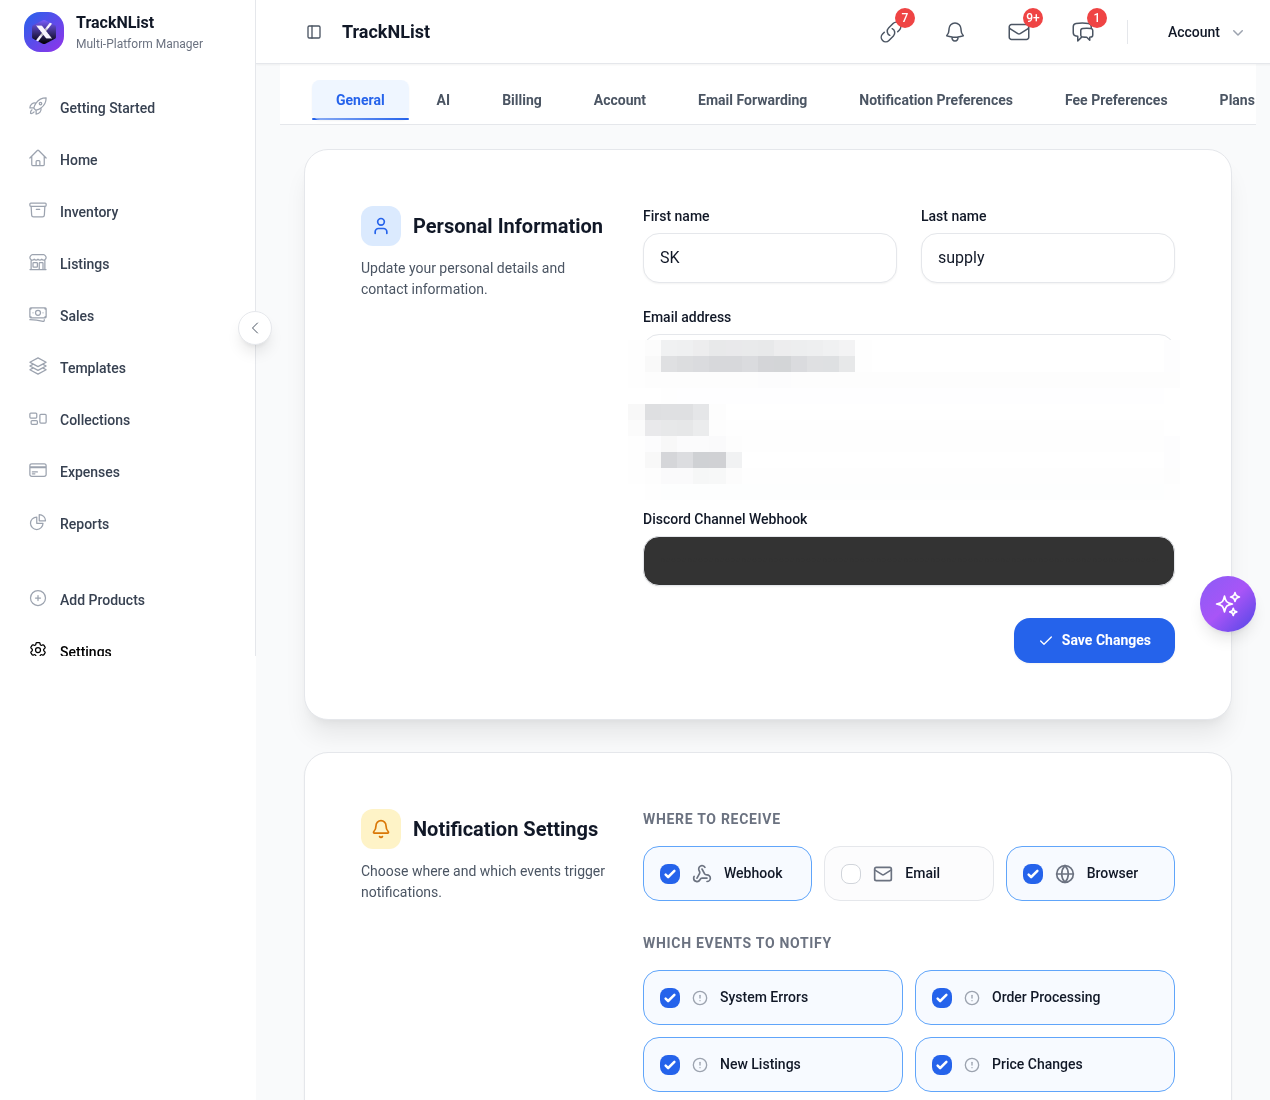
General — name, username, Discord webhook, notification channels (Webhook / Email / Browser), event toggles (orders, new listings, price changes, low stock, returns).
-
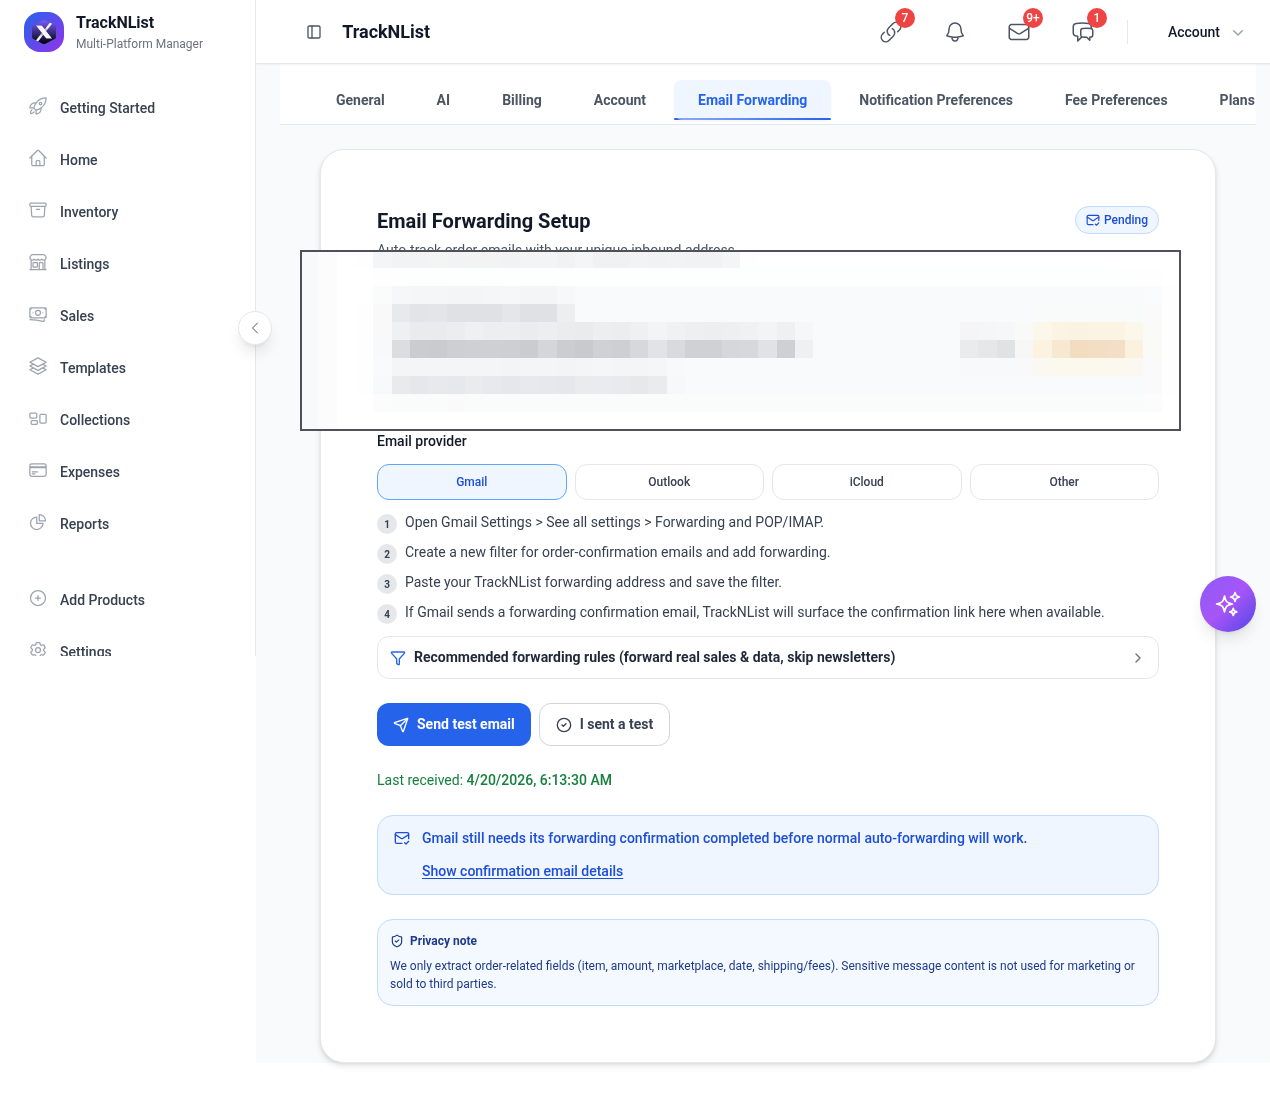
Email Forwarding — this is how auto sale detection actually sees marketplace emails. Getting Started marks it Recommended. TNL gives you a unique @orders.tracknlist.com address. Forward order confirmations there (Gmail / Outlook / iCloud / Other). Status starts as Pending until the provider confirmation is done.
-
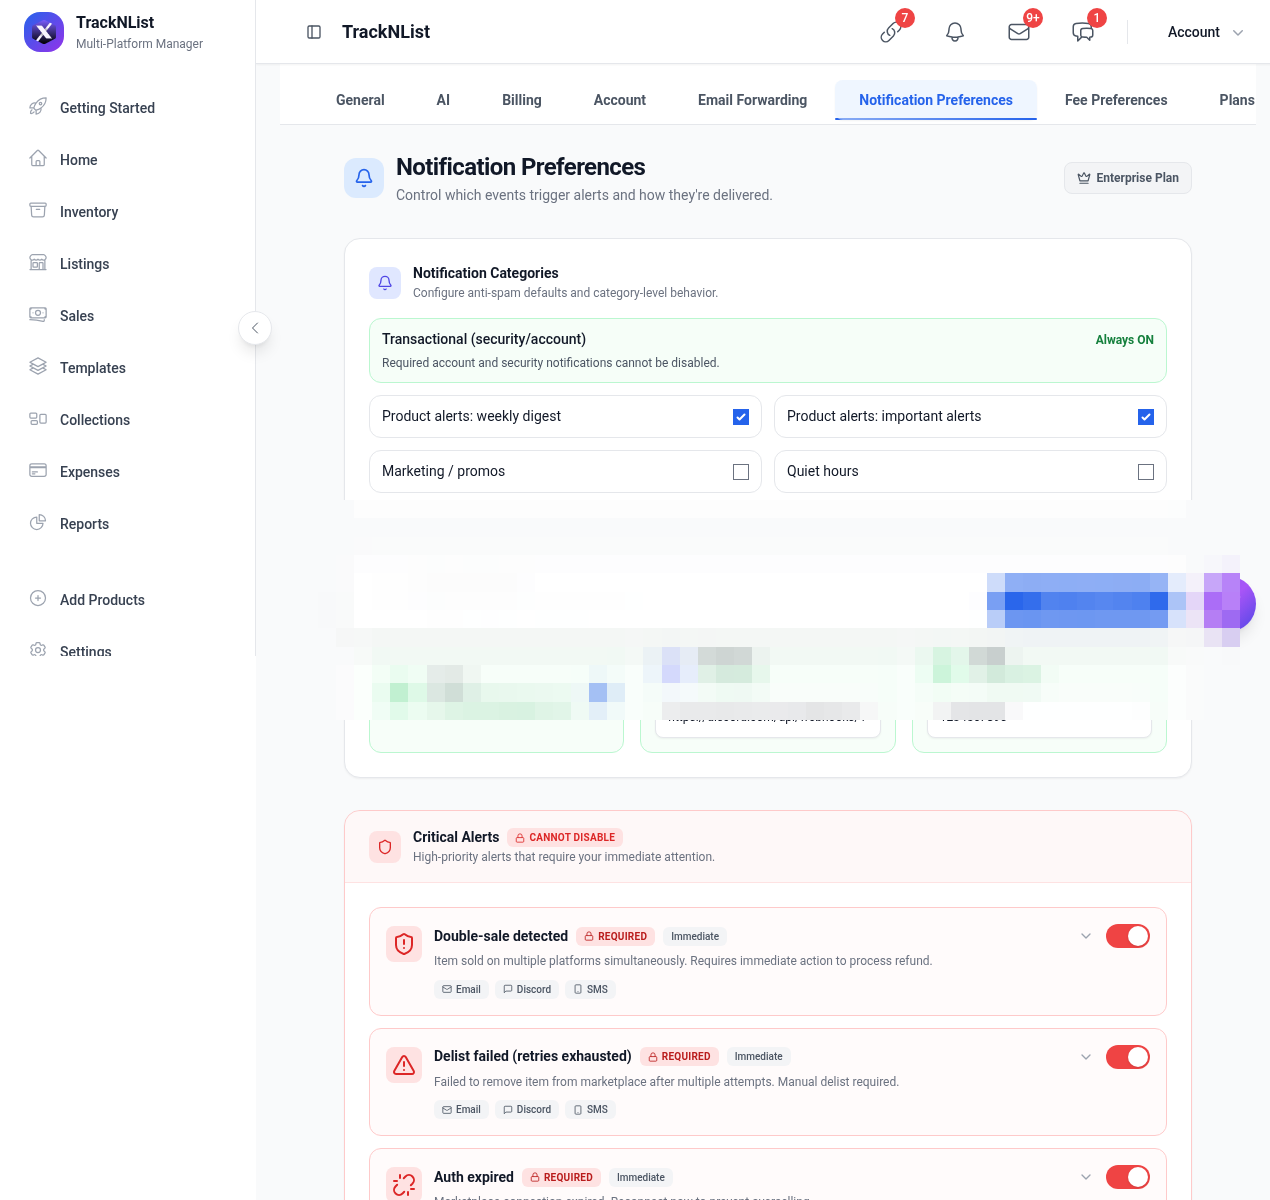
Notification Preferences — pick webhook / email / browser, and which events fire (orders, new listings, price changes, low stock).
-
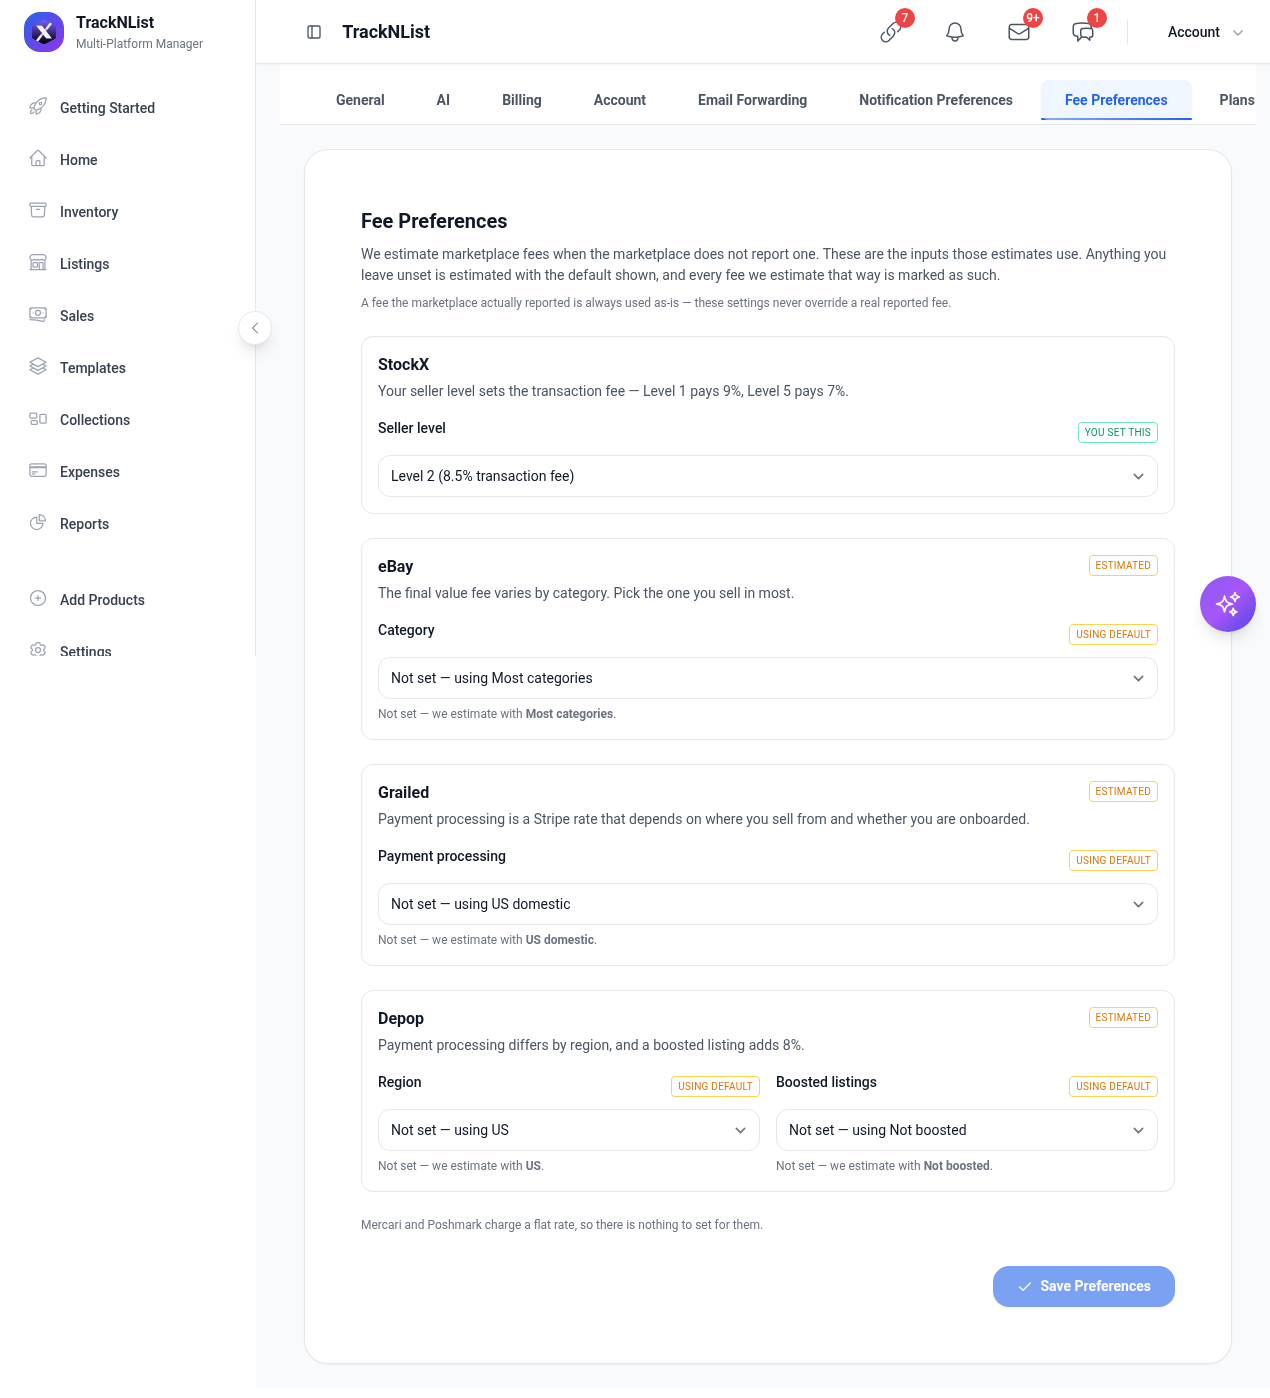
Fee Preferences — set StockX seller level, eBay category, Grailed processing, Depop region so payout-after-fee is accurate.
-
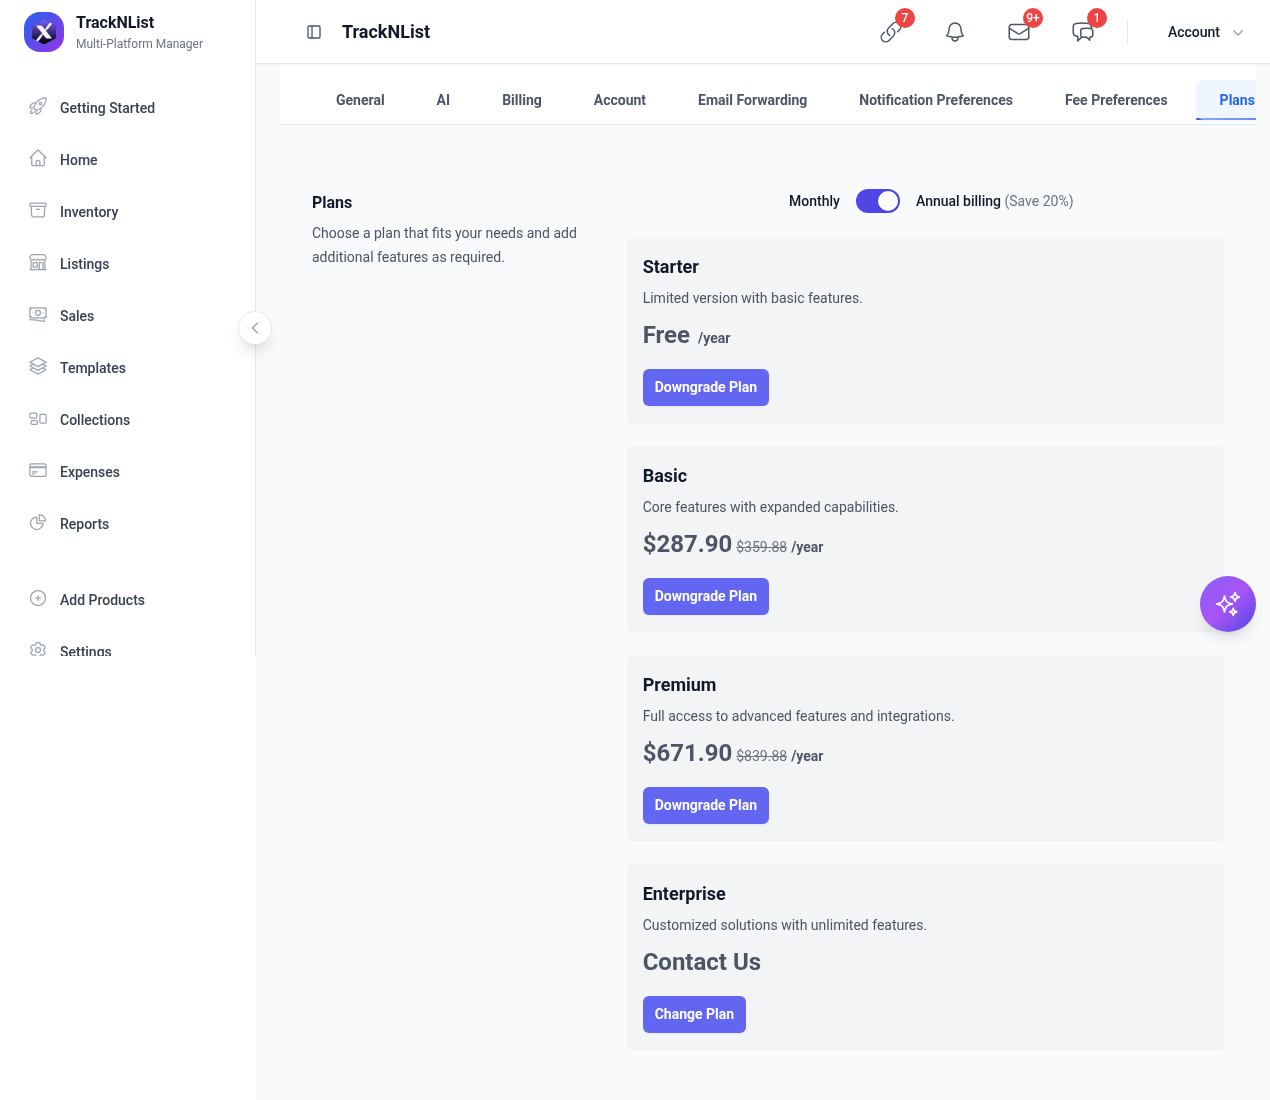
Plans — Starter, Basic, Premium, Enterprise. Auto sale detection and extra platforms are plan-capped. If delist stops, check here first.
-
Platform Configurations — which marketplaces are selected + how each account is connected. Covered in the next section.
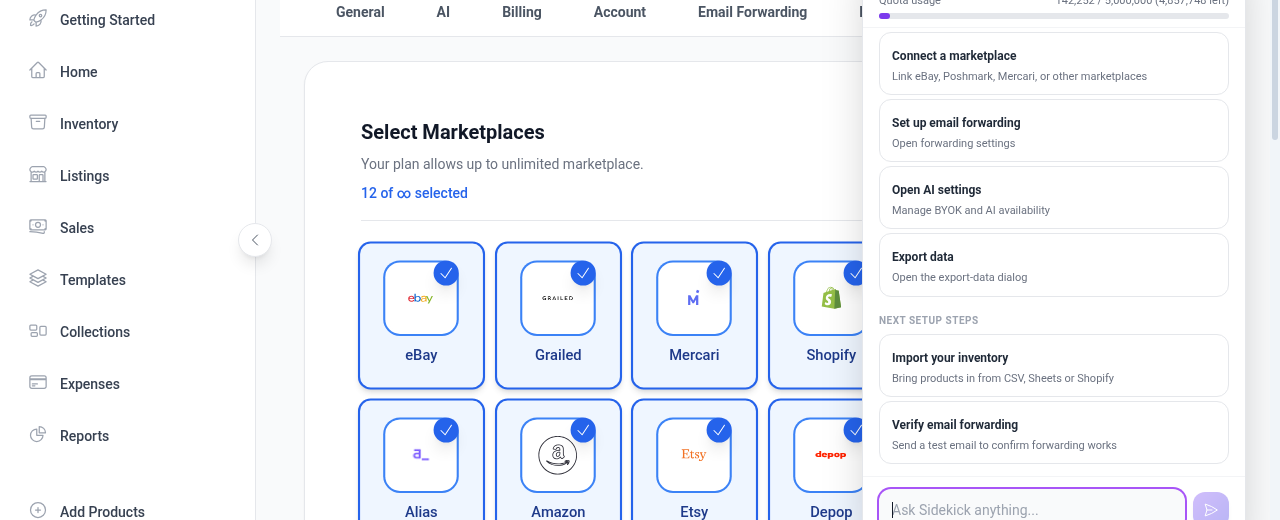
Purple sparkle, bottom right = AI Sidekick. Page-aware shortcuts and a chat box. Optional.
How do I connect marketplaces?
Listings only go to platforms you’ve connected. Some use a login. Some need the TrackNList Chrome extension.
-
Settings → Platform Configurations (or /settings/platform-config).
-
Select Marketplaces is the grid of platforms your plan allows. Ticked = in the catalog. Don’t hit Save Selection unless you’re changing it on purpose.
-
Connect Marketplace Accounts is the actual login/extension state.
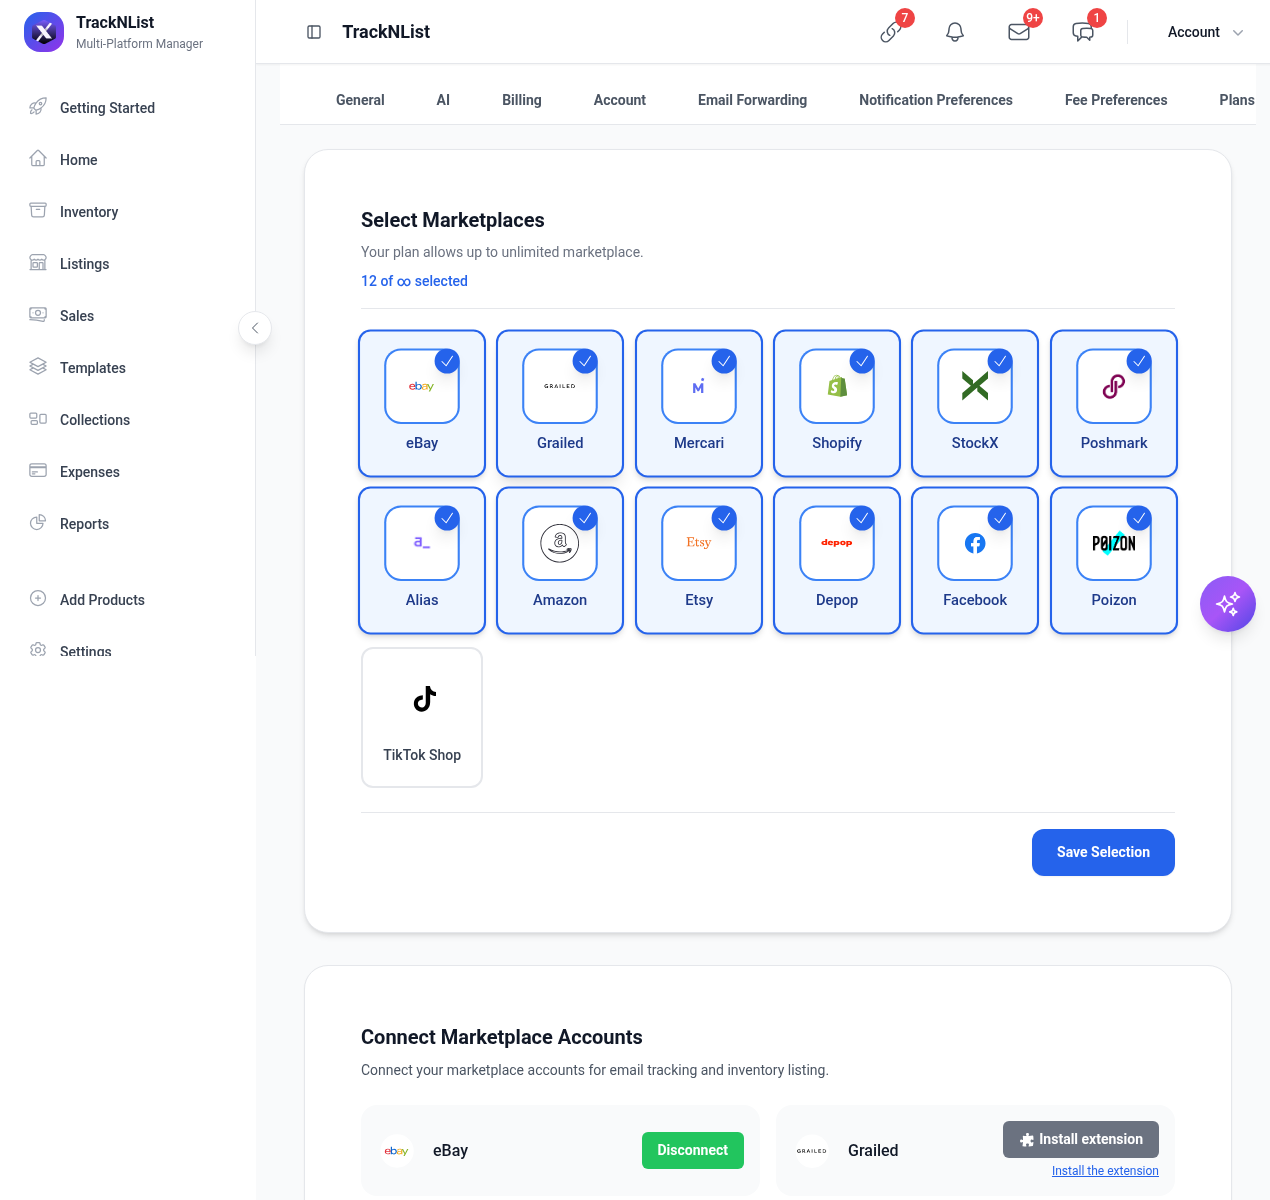
Green Disconnect = connected (eBay, Alias, Shopify, StockX, Facebook, Poizon). Install extension = Grailed, Mercari, Depop, Poshmark. Amazon/Etsy may show Coming soon. TikTok may say Upgrade to connect.
-
Login-style platforms: click connect, sign in, approve. Extension platforms: install the Chrome extension from the link, then finish in TNL.
How does inventory sync and auto-delist work?
-
Quantity lives on the Inventory row. Listings inherit it. Green Synced means TNL thinks they’re tied.
-
When a sale comes in (marketplace API or forwarded order email), qty should drop. Other listings for that item should go DELISTED / inactive so you don’t oversell.
-
If that fails, Home shows oversell risk: OOS but still listed. Filter Inventory by Oversell Risk and delist those rows.
-
Linking / Dedup in Getting Started is how you merge “same item, two records.” Listings that say 1 other duplicate belong in that queue. Accept or reject matches. Don’t ignore it or sync will fight itself.
How do I manage and edit listings?
-
Change qty, cost, or the master title in Inventory (or Bulk Edit). That’s the source of truth. Don’t hunt every marketplace row unless you’re changing one platform’s copy.
-
On Listings, use the row ⋯ for per-marketplace actions. Filter by platform first so you don’t blast the wrong channel.
-
Delist from the listing row or from the oversell-risk inventory filter. Confirm status flips to DELISTED / Inactive.
That’s the loop: Getting Started → connect platforms → add or import inventory → list it → let sync/auto-delist keep qty honest → edit Inventory first, Listings second.